
Establish the connection
Identify your MNSP and prepare the connection
Locate and document the managed network equipment before connecting the store computer to an approved backoffice port.
Purpose
Before connecting a Windows computer, identify the store’s Managed Network Service Provider (MNSP) and the exact appliance that provides the POS backoffice connection.
An MNSP appliance helps separate and protect the POS, payment, fuel, and store networks. A location may have several routers, firewalls, modems, and switches near one another, so do not assume the first network box you see is the correct device.
Step 1: Locate the network equipment
The managed network equipment is often found:
- Near the POS controller, router, modem, or existing backoffice equipment
- Inside a network cabinet or mounted on a wall
- Where labeled Ethernet cables from the POS and store network meet
Look without unplugging or moving equipment. If the device is inside a locked or restricted cabinet, ask the store owner or network provider for access.
Step 2: Record what you find
Take clear photos of:
- The full device from the front
- The manufacturer and model label
- The back of the device, including visible port labels
- The existing cable layout and any cable tags
Do not photograph passwords, Wi-Fi keys, payment-terminal secrets, or customer information. These photos help the MNSP identify the correct port without asking store staff to experiment with the network.
Common MNSP equipment
The examples below show common equipment families. The exact model and port layout at a store may differ.
1. Cybera
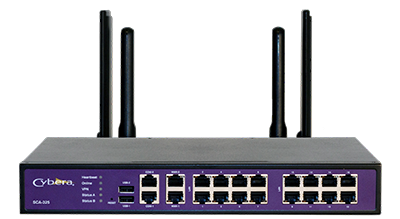
Often a dark appliance with multiple Ethernet ports and a Cybera label or logo. Confirm the model and backoffice port with Cybera before connecting.
2. Hughes
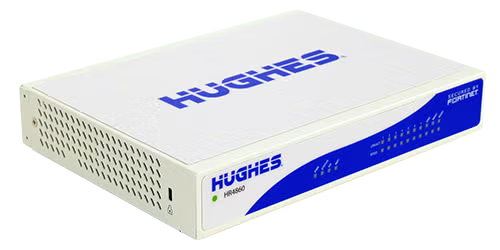
Often an off-white or light-gray appliance with a Hughes label and front-panel status lights. Port layouts vary by model and provisioning.
3. Fortinet
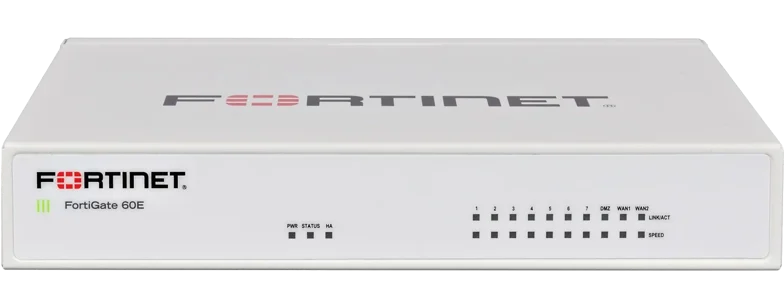
Often a light-gray appliance labeled Fortinet or FortiGate. The number of ports does not by itself identify how the device is configured.
4. Acumera
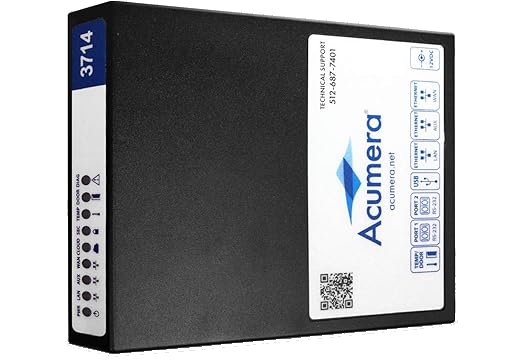
Often a compact dark appliance with an Acumera label. Acumera may provision the backoffice path through the store router rather than a universal dedicated port.
5. Mako
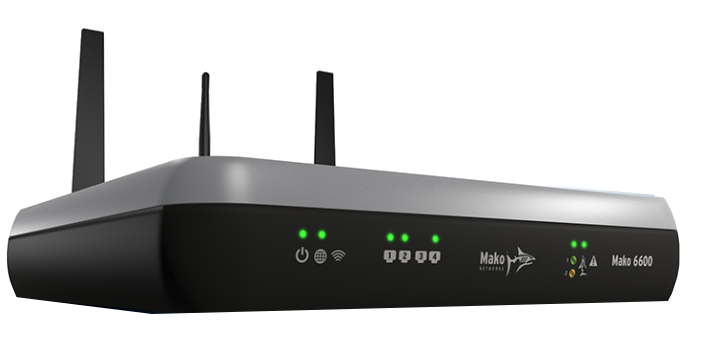
Often a dark or silver-and-dark appliance labeled Mako Networks. Confirm the exact model and port with Mako support.
6. Paysafe UTM
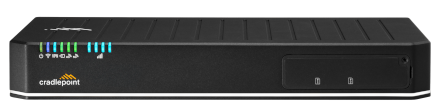

Paysafe/PDI-managed sites may use hardware branded Cradlepoint or Meraki. Identify both the hardware model and the managing provider; instructions for one model must not be applied to the other.
Step 3: Confirm the approved connection
Before attaching a cable, ask the MNSP to confirm:
- The equipment model
- The exact backoffice port
- Whether the port is free or may be shared
- Whether an unmanaged switch is permitted
- The correct network settings for this store
- Whether the connection work could interrupt payment or fuel service
If the provider expects downtime, schedule the work for an attended maintenance window. Do not reboot network equipment or proceed while the store is actively processing transactions unless the provider has explicitly coordinated it.
Step 4: Prepare the Windows computer
Place the approved computer where its Ethernet cable can reach safely. Connect a USB-to-Ethernet adapter if the computer needs one, but wait for the confirmed port and network facts before connecting the MNSP end.
Advantage’s normal customer onboarding should not require typing route commands or experimenting with Windows network values. If manual network configuration is still required, an authorized support technician should apply the provider-approved facts and document the result.
Next step
Follow the guide for the confirmed provider: Cybera, Hughes, Fortinet, Acumera, Mako, or Paysafe/PDI. After cabling is complete, repeat How to check if you have a backoffice connection using only the exact supported POS endpoint.