
Establish the connection
How to check if you have a backoffice connection
Test the exact standard Verifone Commander or Gilbarco Passport endpoint from the Windows computer that will run Advantage.
Purpose
Use these checks to confirm whether the store’s Windows computer already has a network path to its POS. Choose the section that matches the store’s declared POS type.
Only test the exact address shown below, or an exact store-specific address already confirmed by the owner or network provider. Do not scan the store network or try nearby addresses.
Before you test
- Run the check on the Windows computer intended for the Advantage Agent.
- Confirm whether the store uses Gilbarco Passport or a Verifone system served by Commander.
- If the POS type or endpoint is uncertain, stop and ask the store’s POS or network provider.
Verifone Commander sites
-
Open a web browser on the store’s Windows computer.
-
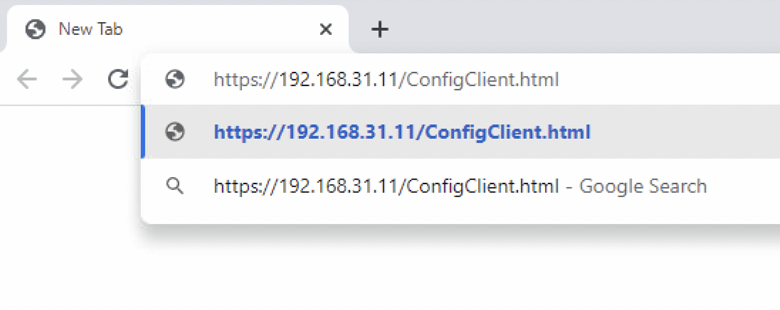
Enter this exact address:
https://192.168.31.11/ConfigClient.html
-
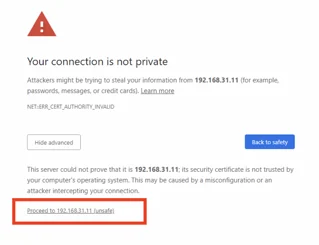
If the browser displays a certificate warning for 192.168.31.11, select Advanced, then continue to that exact local address.
This warning is expected because Commander commonly uses a local, self-signed certificate. Do not bypass a warning for a different address.
-
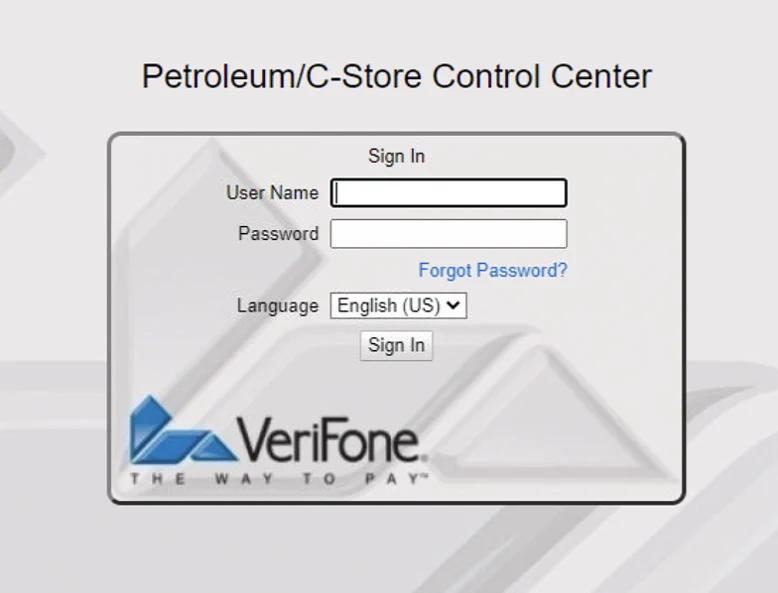
A successful connection displays the Petroleum/C-Store Control Center or Commander ConfigClient page.
Result
- Page opens: the computer has a network path to the Commander endpoint.
- Page does not open: stop. Confirm the physical backoffice connection and exact network facts with the store’s MNSP. Do not search the subnet for another controller.
The page opening does not prove that the POS is supported, that the Agent has valid permissions, or that the store is ready to send changes. Those checks happen later in onboarding.
Gilbarco Passport sites
-
Open File Explorer on the store’s Windows computer.
-
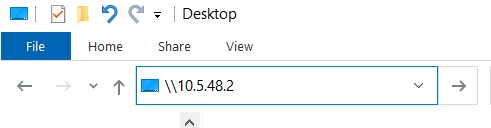
Enter this exact address in the address bar:
\\10.5.48.2
-
Press Enter.
-
If Windows requests network credentials, the standard Passport account is:
- Username:
BackOffice - Password:
BackOffice
Both the B and O are uppercase. Select Remember my credentials only on the approved store computer.
A store may have replaced the standard password. If Windows rejects the standard credentials, stop and obtain the store-specific backoffice password from the owner, Gilbarco ASC, or network provider. Do not repeatedly guess credentials.
- Username:
-
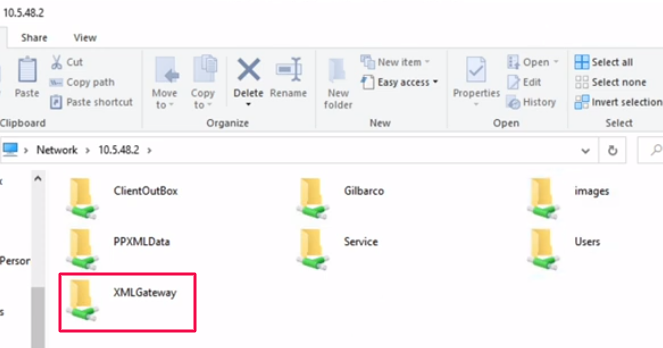
Confirm that the XMLGateway folder appears.
Result
- XMLGateway appears: the computer has a network path to the Passport backoffice share.
- The share or folder does not appear: stop. Confirm the physical backoffice connection, approved share credentials, and exact network facts with the store’s MNSP or Gilbarco support.
Seeing XMLGateway does not prove that all Passport export options are enabled, that fresh sales data exists, or that the store is ready for register writes. Those are separate onboarding checks.
Next step
If the appropriate test failed, continue to What you need for a backoffice connection. If it passed, continue with Verifone Commander configuration or Gilbarco Passport configuration.